February, just over a month after Christmas, is the perfect time to ditch useless gifts from unknown cousins and buy your real present. A real computer! The order is placed and there is a surprise… Instead of a magnificent PC there are a bunch of boxes that you don’t know what to do with. Don’t panic, a little patience, composure and a good screwdriver will do the trick!

Before starting this tutorialWe remind you that assembling a computer is not without risks for you or your equipment, so we ask you to pay the greatest attention. Neither Techbose nor I can be held responsible in case of damage to your equipment. Never touch components at the contacts or solders to avoid static electricity or cuts, and especially do not put your hands or anything else inside a turned on or plugged in PC. We strongly recommend a first reading before getting to work. On that note, good luck!
1. The spine

To start, let’s take the foundation of any good PC: the case! Here we are in the presence of the famous NZXT Phantom, the strong point of any box must be its ventilation but also its ease of installation. First of all, let’s install Q-Shield. This small piece of metal serves to house the different ports on the motherboard.

Once installed, place the heart of the computer: the motherboard! To install the latter, you will have to start by pointing the brackets in the places indicated on the case or in its instructions. The locations differ depending on your motherboard: ATX, Micro-ATX, E-ATX… To install it, place the ports in front of the Q-Shield, the card slightly inclined and insert it. It remains to screw the screws into the previously fixed supports. The screws only hold the card, there is no point (or even risk) in tightening them too much! Your motherboard is perfectly installed! We still have to feed him, but we’ll see about that later.

After the head, the brain. We install the processor! Installation differs slightly depending on the socket or brand, here we are surely on the most used currently: the Intel socket 1155. To open the support, press and then slide the side lever to release it. Lift to open the bracket and insert the processor. Beware of misguided people! Do not force or touch the connectors.. Finally close the support by following the previous steps in reverse. Normally everything is well arranged, there is no risk of movement.
The processor is one of the hottest parts of the computer when it is on, which is why we use a cooler. Some will use the one that comes with the processor, but others, finding it confusing and inefficient, will replace it with a larger one. In any case, to improve temperature transfer, thermal paste is used to improve the contact surface.

There are two methods of placing the dough: stretching or flattening. The first consists of putting the equivalent of a small grain of rice of dough on the CPU and spreading it using a card (Game Loyalty?) in order to put a very thin and well distributed layer. The second will use the same amount of dough but we will directly apply the chiller which will flatten the dough. Thermal paste is a toxic substance. to keep off the skin and of course the mouth. Regarding the application of the cooler, I refer to its instructions. Some are more complex than others to install. To connect your cooler, look for the 3- or 4-pin connector called CPU_FAN on the motherboard.

Depending on the cooler used, this step must be done before or after installation. Yes, we are going to talk about random access memory, RAM. First of all, just like the CPU, there are different generations that are not compatible with each other. The latest one that has been used for a few years is DDR3. The differentiation is simple, the location of the key in the contacts. See the photo below.

Installing RAM is not trivial and should follow an order specified in your motherboard manual. The order that occurs most frequently is as follows (from left to right, CPU to the left): A1 A2 B1 B2. If only one RAM is used, it will fit in slot A2. For 2 strips: A2 + B2. It is not recommended to use 3 strips. The small white flaps should be attached to the pin.

2. Additional members
For practical reasons depending on the case and the available space, the installation of the graphics card will be done more or less later. We’ll start now. To do this, nothing could be simpler, you will have to start by removing the small rear covers. One or two depending on your card, be careful, they are quite sharp elements. The card is then very simple to install. A simple pressure will be enough for it to enter its port.

As for hard drives and other readers, their installation differs depending on your box. Most of the time you will need to cut out 3.5″ hard drives and aim for 2.5″ ones. All you have to do is slide them into the slots. As for connections, that happens in the end.

Last part, food. Of course it is one of the pieces that you can install whenever you want but in the end the wiring is simpler, you can also install it at the end to avoid tangles, especially if it is not a modular power supply. It is also one of the easiest parts to install. A huge reserved space, 4 small screws to screw in and that’s it.

3. Wiring and organization
The most personal part, a part that will also depend a lot on your team but also on you. Throughout the wiring of the PC you will have to juggle between practice and placing everything without using the wrong cable. We start with the motherboard power supply, with the longest end. This connects to the right side of the motherboard, an easily accessible location.

We continue feeding the motherboard with what will be used for the CPU. This happens on the top left of your card via an 8 pin or 2×4 connector as if it were underneath but also a 4 pin.

Place the graphics card, the consumer element. 6, 8, 12 or more, everything will depend on your graphics card.

Finally, when it comes to powering your beast, don’t forget about hard drives or SSDs. Logically, in the case of a PC that is not ten years old, we will do without the old Molex. Here is the SATA, a small one for data transfer, a larger one for power. Pay attention to the direction, it can be fragile, we avoid using too much force as there is a risk of bending the connectors.

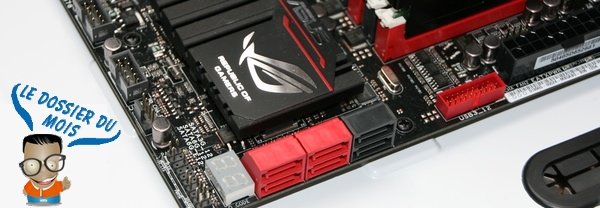
We move on to the most complicated part for complete beginners: the additional cables. Power, USB 2.0 or 3.0, audio… All those little things that come out of your box and that we don’t know what to do, we solve them. To start, the simplest: USB with version 3.0, easily recognizable thanks to its blue color. This one doesn’t really have a predestined place on the motherboard but with its format you won’t have any problems finding it. USB 2.0 is usually located on the bottom of the board. See the following photos.

Asus is one of the only ones that thinks about our little beginners in publishing thanks to its 2-in-1 Q connector. For others, you will have to stick your head into the PC to read the inscriptions under the pins usually located at the bottom right. In the photo below you can see the order of things with the speaker on the back (sometimes not included and/or not very useful) on 4 pins and the LEDs on 2 different and separate pins.

Small last photo to give you an idea of the location of the different cables.

4. Conclusion
And there you have it with a normally functional computer, do not hesitate to contact us in case of problems or other comments we will respond with pleasure. All you have to do is install your operating system as well as the various drivers that are included in your motherboard box.

See you in a few days to give you a little guide/advice in case you are not sure what equipment to buy. And as always, a new file in a month!